Easiest Way to Cook Perfect Patriotic Red Blue White Stripes TasteApple Cider Smoked Pork
Apple Cider Smoked Pork.
 You can cook Apple Cider Smoked Pork using 27 ingredients and 14 steps. Here is how you achieve it.
Ingredients of Apple Cider Smoked Pork
- It's 4-5 pound of pork butt roast.
- It's of large bag of applewood chips for smoking.
- You need of For the Brine.
- Prepare 3 cup of hot water.
- Prepare 1/4 cup of salt.
- You need 3 tbsp of white sugar.
- Prepare 1/2 cup of apple cider vinegar.
- You need 1 1/2 cup of apple cider.
- It's 1 tsp of garlic powder.
- You need 1 tsp of onion powder.
- You need 1/8 tsp of cayenne pepper.
- It's 1/2 cup of cold water.
- Prepare 20-25 of ice cubes.
- It's of For the Rub.
- You need 2 tbsp of paprika.
- Prepare 1 tsp of garlic powder.
- It's 1 tsp of onion powder.
- It's 1 tsp of salt.
- You need 1 tsp of black pepper.
- It's 1 tsp of brown sugar, packed.
- It's 1/2 tsp of dried basil.
- It's 1/8 tsp of cayenne pepper.
- Prepare of Mop Sauce.
- It's 1 cup of apple cider.
- It's 1/2 cup of apple cider vinegar.
- You need 1/2 cup of cold water.
- You need 1 of any remaining rub.
Apple Cider Smoked Pork step by step
- Brine stage: The day before smoking; In a very large, deep and slightly narrow bowl or container combine hot water, salt and sugar. Whisk vigorously until salt and sugar are dissolved. Add all other ingredients in order listed. Whisk again until combined. Not all the ice will melt right away, you're using it to simultaneously add more water and cool the brine. Note: Your bowl should be so large that the liquid comes halfway up the sides or less to allow room for water to rise when the meat is added..
- Brine stage: If you pork butt came bound on a twine net leave it this way. Gently place your pork butt into the brine. It should be completely submerged. If it's not, try a narrower container or alternately add more cider and cold water 1/2 cup at a time until the meat is completely submerged. This method will dillute your brine so I recommend a properly sized container. Cover, place in fridge and allow to sit for at least 12 hours, but no longer than 18 hours..
- Rub stage: 1 hour before you want to begin smoking remove your pork butt from the brine, gently pat dry with paper towels and place on large platter. Combine all rub ingredients in a small bowl, use your fingers so you can break up any clumps..
- Rub stage: generously sprinkle your pork butt with the rub on all sides, rubbing the seasoning into the meat as you go. As the great Steve Raichlen would say, "That's why they call it a rub." ;) You do not have to, and most likely will not, use all of the rub. That's ok..
- Rub stage: When your pork butt is generously coated leave it resting out on the platter to come to room temperature before smoking/while you get your smoker or grill ready. At this time you can make your mop sauce too. In a medium bowl whisk any remaining rub into the liquid mop sauce ingredients and set aside..
- Smoke stage: FINALLY, Time to smoke it! While your pork butt is coming to room temperature also soak your wood chips in a large bowl of water (so they will create smoke before burning up) and get your smoker going or set up your grill for indirect heat (this is how smokers work, so it's how you smoke without a smoker. Lol). If you are not sure how to set up a grill for indirect heat instructions for this can easily be found with a quick Google search..
- Smoke stage: Heat your smoker/grill to only 225-250°F, use a grill thermometer to track temp. When the device you will be using is ready, place a few handfuls of wood chips directly on your coals, make sure there is not so much that you smother the coals (if you are using gas or electric smoker or grill use the appropriate container meant for your device, you will not need to soak the chips in this case either). Place your pork butt on the grate for the meat and close the lid tightly so the smoke stays trapped around the meat as it slowly cooks..
- Smoke stage: Do nothing with the meat for the first 2 hours. You may need to add more wood chips to your smoker during this time and that's ok, simply open the heat source door and throw more on your coals. You may also need to restock your coals too. Just know your smoker, and know what you're doing. Again, if you don't know or are unsure, Google is your friend. ;).
- Smoke stage: After 2 hours lift the lid off your meat and baste with your mop sauce. You can use a basting brush for this. There's no need to actually brush it, just blot at it gently all over with the brush. There is also a special tool for this, called a mop that actually looks like a mini mop, that can be used and makes the basting go quicker. Dip it in the bowl and gently plop it on the meat. Repeat this mopping step every 1 hour for the next 4 hours, tending your coals and chips as needed the whole time. This is a total of 6 hours cooking time so far..
- Smoke stage: After 6 hours on the smoker wrap the pork butt tightly in aluminum foil and transfer to a 250°F preheated oven, directly on the center rack, to continue cooking for another 2-3 hours or the internal temp is at least 190°F. Remove from oven and let rest wrapped in foil for 30 minutes..
- Pulling stage: Carefully transfer wrapped pork to a rimmed baking sheet and open foil. Use two large forks to pull pork apart into chunks of various size, or a pair of insulated food gloves to pull pork by hand (there are also other various tools for meat pulling). You do not want to completely shred the pork so keep that in mind..
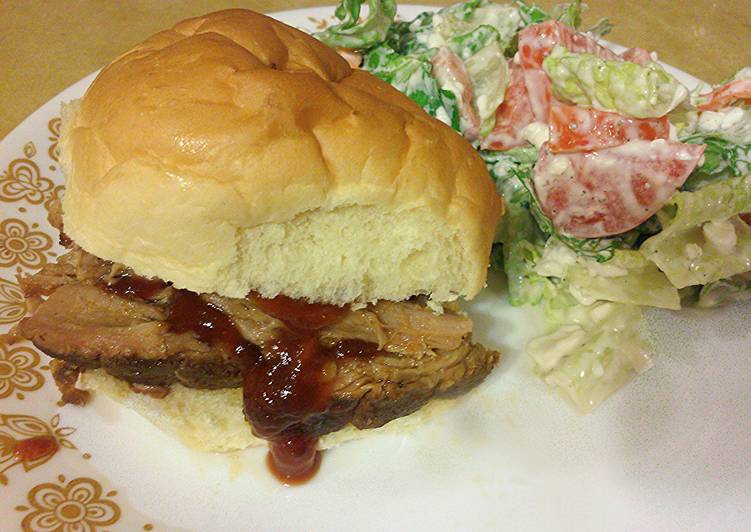
- FINALLY, SERVING STAGE: Transfer pulled pork and all its juices to a serving platter. Provide sweet buns, like King 's Hawaiian brand, and a sweet BBQ sauce For everyone to build their sammiches. I HIGHLY recommend this sauce I custom made to compliment the sweet notes in the pork created by the cider. https://cookpad.com/us/recipes/347791-sweet-n-smoky-bbq-sauce.
- NOTES: For anyone who wonders, the brine is necessary to not only begin building the flavor profile, but also to ensure the meat stays moist and tender throughout while cooking. With a brine there is no need to inject your meat with the solution either. A brine works differently than a marinade in that the high salt content of a brine works to draw the liquids of the brine into the meat itself rather than the flavor infusion concentrating on the surface. However, this same high salt.content will not make the meat overly salty..
- TOTAL COOKING TIMES: Brine stage: 12-18 hours, plus 15 minutes for prep. Rub stage: 1 hour plus 15 minutes for prep. Smoke stage: 8-9 hours plus 30 minutes for resting. TOTAL RECIPE TIME: 21-28 hours. HANDS ON TIME: 4.5 hours. Hands on accounts for prep and time you will spend tending your smoker/grill while your meat cooks. It takes a long time, but doesn't need WORK the whole time. This is such a long process I felt the need to break it down for those who may wonder. :).
Post a Comment for "Easiest Way to Cook Perfect Patriotic Red Blue White Stripes TasteApple Cider Smoked Pork"